Difference between revisions of "Rainboard - DIY Dynamic Rainbow Isomorphic Keyboard"
BrettThePark (talk | contribs) |
BrettThePark (talk | contribs) |
||
| Line 41: | Line 41: | ||
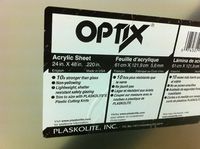
A 48" x 24" x 0.220" piece of clear acrylic (plexiglass) was purchased to be the body of the rain board. This piece could easily be substituted with a piece of plywood or any other sturdy material. We only needed ~ 2' x 2' of the material for the board so we cut the sheet in half. The design for the Rainboard was developed as a CAD drawing and printed to scale. It was then taped to the acrylic. | A 48" x 24" x 0.220" piece of clear acrylic (plexiglass) was purchased to be the body of the rain board. This piece could easily be substituted with a piece of plywood or any other sturdy material. We only needed ~ 2' x 2' of the material for the board so we cut the sheet in half. The design for the Rainboard was developed as a CAD drawing and printed to scale. It was then taped to the acrylic. | ||
| + | [[File:Rainboard_10mm_spacing_holes_single_unit.dwg|CAD file for the Rainboard]] | ||
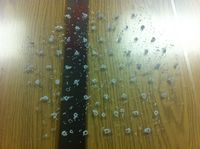
[[File:Rainboard Acrylic CAD Printed and Punched.JPG|200px|CAD drawing punched]] | [[File:Rainboard Acrylic CAD Printed and Punched.JPG|200px|CAD drawing punched]] | ||
| Line 70: | Line 71: | ||
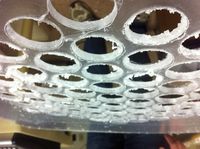
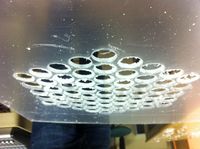
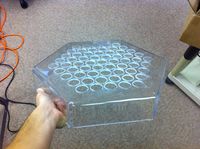
[[File:Rainboard Acrylic Finished 2.JPG|200px|Final Housing for the Rainboard]] | [[File:Rainboard Acrylic Finished 2.JPG|200px|Final Housing for the Rainboard]] | ||
<br style="clear: both" /> | <br style="clear: both" /> | ||
| + | |||
== Button Drilling == | == Button Drilling == | ||
Revision as of 16:10, 8 October 2012
Contents
- 1 The iPad version of the Rainboard (Musix) can be found at the main Shiverware webpage
- 2 Mailing List
- 3 Current State of the Rainboard
- 4 Active Development Updates
- 5 Hardware List
- 6 Acrylic Cutting and Moulding
- 7 Button Drilling
- 8 Button Insertion
- 9 LED Wiring
- 10 Button Wiring
- 11 Button Shield Modifications
- 12 Musical Instrument Shield
- 13 LED Connection
- 14 Arduino Code
- 15 Additional Shots
- 16 Accelerometer Integration
- 17 PCB Design
- 18 Pitch Bend
- 19 Wave Visualization
- 20 SysEx Speed
- 21 Future Plans
- 22 Issues / Limitations Encountered
- 23 External Links
The iPad version of the Rainboard (Musix) can be found at the main Shiverware webpage
Mailing List
The goal of the Rainboard is to create an Isomorphic Musix Keyboard that is easy to reconfigure and provides visual feedback to the user.
Current State of the Rainboard
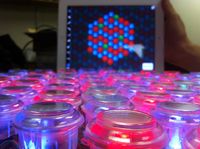
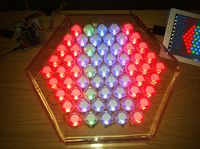
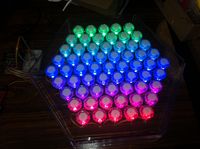
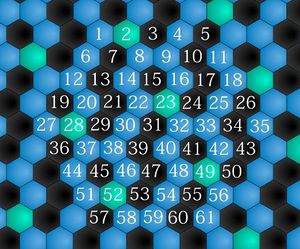
The Rainboard is a 61 button isomorphic keyboard. Each button contains a RGB led in order to light up the button. A midi value is also mapped to each button. The colours and midi values of the buttons are set from an external source (currently the Musix iOS application, but could easily be set by any serial midi device) using sysex messages. This allows the layout to be change very rapidly. All that needs to be done is to use Musix to select the desired layout on screen and push a button to send the data to the Rainboard. The Rainboard then sets all the LEDs and midi values then stores these values in EEPROM to save settings across resets so the external device is not needed after the desired layout is set. When buttons are pressed the midi values are sent across usb to an iPad. Any MIDI program on the iPad can be used to create the audio (NLog Pro Synth is a favorite, Arctic Keys, or SampleWiz). In early version of the device we had an onboard midi instrument shield as well, but the sound wasn't great so we decided to remove it from future versions.
Active Development Updates
For a frequently updated list of development activity please watch the Rainboard Updates page.
Hardware List
The current hardware for the rain board uses standard DIY parts off of the internet.
- 61 - LED Pixel RGB 8mm Naked PCB [1] from Bliptronics
- 61 - Arcade Button - 30mm Translucent Clear [2] from Adafruit
- 64 Button Shield [3] from SpenzieLabs
- Arduino Uno Board [4]
- Accelerometer - Triple Axis Accelerometer Breakout MMA8452Q [5]
- SoftPot (ribbon sensor) - 100mm [6]
- Musical Instrument Shield [7] (No Longer Used)
- iOS Serial Cable [8] - Redpark Serial Cable (No Longer Used)
- 0.220" (0.559 cm) thick x 24" x 24" piece of acrylic (plexiglass)
Acrylic Cutting and Moulding
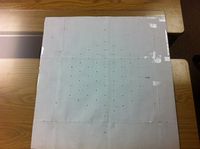
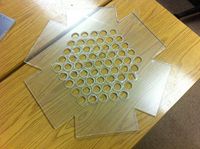
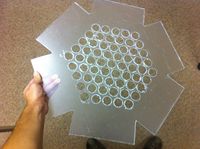
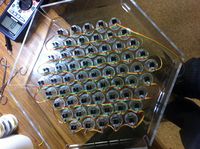
A 48" x 24" x 0.220" piece of clear acrylic (plexiglass) was purchased to be the body of the rain board. This piece could easily be substituted with a piece of plywood or any other sturdy material. We only needed ~ 2' x 2' of the material for the board so we cut the sheet in half. The design for the Rainboard was developed as a CAD drawing and printed to scale. It was then taped to the acrylic.
File:Rainboard 10mm spacing holes single unit.dwg
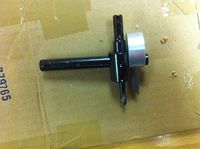
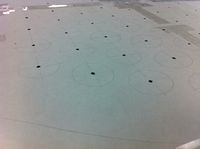
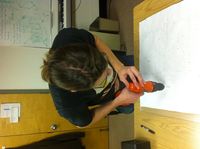
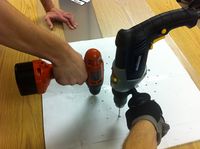
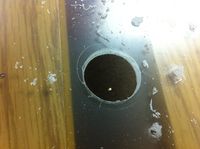
Each button hole was punched in order to ensure accuracy. Each punch hole was then drilled twice with two different bits in order to ensure not to crack the acrylic. An adjustable hole saw was then used to drill each hole. This process proved to be difficult using a hand drill. A drill press would have likely been easier to use, however the one that we had access to did not offer enough room between the drill location and the back of the press in order to reach the inside of the acrylic. As well, the drilling of the holes caused the acrylic to melt and stick to the side of the holes. This forced use to use a Dremol in order to grind away the excess plastic. It was originally decided not to use a hole saw as they generally only come in 1 1/8" and 1 1/4" sizes and we needed a size of ~ 1 3/16". However, it might be able to use a 1 1/8" hole saw and then Dremol the hole slightly larger.
After all the holes were created the rest of the acrylic was cut with a skill saw using a metal cutting blade. The process was loud but worked well. Although the cuts were not perfectly on the line, the end result was acceptable.
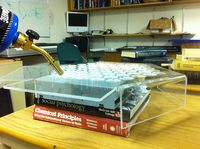
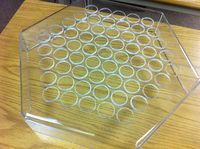
The acrylic was then placed on the edge of a table. For the first edge, a computer case door was placed on the acrylic with some weight on it to keep it flat. A heat gun was used slowly heat the acrylic so it could be bent down at a 90 degree angle. After this process was done it was noticed that a large bubble had formed on the acrylic top. A propane torch was used to head up the bubbled area. Weight was then put on it using the computer case door in order to flatten the area back out. For the other 5 sides the propane torch was used. The quicker heating appeared to work better. After all sides were folded down, the edges of the Rainboard were flamed with the torch in order to get ride of the edges caused by cutting. The end result is that the edges are clear and smooth.
Button Drilling
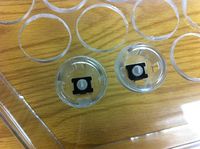
In order to fit the LEDs into the buttons a hole was drilled into the bottom of each button casing. The top portion and plunger of each LED was removed. A 5/16" bit was used to drill a hole in the casing.
Button Insertion
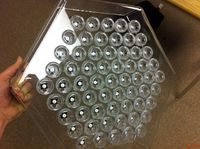
Each button was then inserted into the housing (still without the tops and plungers). Each was inserted with the same orientation. A large majority of the buttons fit well into the housing, however, about 1 out of 6 had an issue with the housing hole being too large. This caused the button to rotate easily or in a few cases, fall right through the acrylic. In order to remedy this issue hot glue was used to secure these buttons in place.
LED Wiring
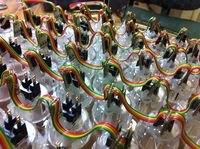
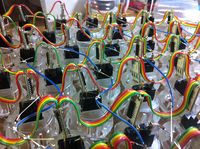
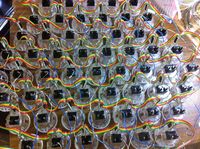
The LEDs were soldered in a chain the length of each button row using 4 wire ribbon cable. Sadly, we ran across a fair number (1 in 10) LEDs where the board was missing a capacitor. After soldering, each strand was tested to ensure all of the solder points were correct. All of the segments were then soldered into one long strand. Each light was inserted into the bottom of the button casing through the hole drilled. A couple dabs of hot glue was added to each side to secure the LEDs.
Button Wiring
Before starting to wire the buttons, some care and consideration was given to the proposed wiring schematic. The button shield works by wiring 8 rows and 8 columns. Our button has 9 rows and 9 columns and its widest point. In order to keep the wiring clean and efficient, a scheme was developed where the rows and columns would hook up on two sides of the housing.
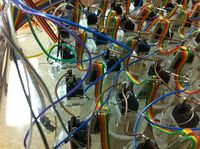
Each column was connected from the button with a diode in order to control voltage flow. This allows the shield to discern which buttons are pressed in the case that several buttons are pressed in similar columns and rows at the same time. The row side of the buttons was connected through using straight wiring. The end of each row and column was soldered to a ribbon cable which runs to the button shield.
Button Shield Modifications
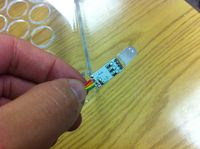
The button shield can either use a SPI or Serial connection to the Arduino.
Much time was spent making sure that no button presses or depresses were missed. This is crucial for the instrument to perform well. The standard stress test that was used was to try to press all the buttons at once, then immediately lift off of the buttons. If all buttons were pressed, and non were stuck in an on mode, the communication was considered successful.
Originally this was accomplished by re-routing the Serial connection to pin 8 with NewSoftwareSerial v11b (as the hardware pins were originally used by the RedPark cable). This had some success, but was not perfectly stable. The standard SPI code provided did not provide the stability required either.
Eventually the final solution was found by using a custom interrupt on pin 2 and using SPI on the button shield. The custom interrupt routine grabs the data coming in from the button shield and stores it in a ring buffer that can be read by the main loop.
Musical Instrument Shield
Originally, a music instrument shield was used to product audio from the device. However, the sounds produced were lacking. The RedPark cable was also originally used to communicate with the iPad, was did so at a slowly and with high latency. Once the project was switch to using MIDI over USB, we removed the instrument shield and no longer use it for the Rainboard.
LED Connection
The LEDs come with a LPD6803 chip which allows easy colour modification over 4 wires. However, one of the problems with this chip is that it requires constant clocking in order to perform PWM. The result is that the Arduino must constantly be sending data. The lights connect to the Arduino using two of the built in SPI Pins (11 - Master Out Slave In and 13 - Clock). By using built in SPI the lights an be updated much faster than bit banging and with less cpu usage. The library that was provided by the buttons worked but took much of the cpu time causing button and serial issues. By switching to the Fast SPI library many of the issues eased off, but did not completely go away.
Arduino Code
The sketch code uses several static tables to map between button/row numbers, led numbers, midi numbers, and note numbers. The note numbers are used as the top layer of abstraction for note location.
The current code is rather simple as all the layout manipulation is done on the iOS Musix side. The Arduino listens for button presses/depresses as well as serial communication. When a button is pressed midi data is sent to the music shield and Musix. As well, the led colour of the note is changed to white. When the button is released the colour changes back to its previous state and a midi off message is then sent to the music shield and to Musix. Currently the Rainboard only listens for midi sysex input from Musix. One sysex message is used to send colours and a second is used to send midi values. All communication between Musix and the Rainboard is done using the native note numbers, not midi values.
Additional Shots
Accelerometer Integration
Although integrating the accelerometer should have been easy, it turned out to be a very difficult task. Turns out there is an issue with the interrupts use of the delay function that took me weeks to find. Since the accelerometer information is longer, you can read in more detail on the Accelerometer Integration page.
PCB Design
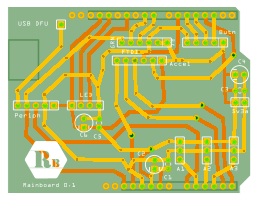
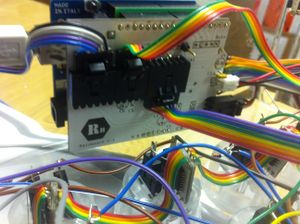
With the original design most of the wires were soldered directly to the boards. In order to increase reliability and aesthetics David Gerhard and I set about designing a PCB for connecting the various electronic elements. I gave David a list of pinouts and he drew up an initial design in Fritzing. Once presented with the initial design I made many modification based on PCB design information I had been reading about embedded hardware design by Catsoulis [9]. Some of the consideration I made included the angle of trace joins, removal of stub traces and the rerouting of a few lines to clean up the board a little. The design was sent off and took over a month to be printed and shipped. Once we had possession of the board, David soldered on the needed connectors and after a short time debugging we had an aesthetic design for our electrical connections.
Pitch Bend
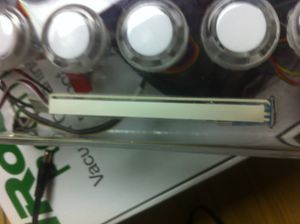
Many electronic instruments have a control for pitch bend and modulation. A discussion formed around whether the Rainboard also needed one. The main argument against it was a design critique: it would alter the symmetry and clean lines of the Rainboard and require cutting through the surface. After it was decided to add a pitch bend control, the addition moved along quite well. A series of small holes were drilled in a line on the surface of the acrylic then the acrylic was flamed to reduce edges. A touch sensor was trimmed and applied to the surface with the end of the connector going through the slot that was drilled. The sensor is by default floating, so it was connected with a large pull up resistor in order to retain a very large analog value when not touched.
Code was added to check the value of the sensor and send along the new value as a pitchbend. In order to perform as expected, the value sent over midi had to be reset every time a large analog value was received. This occurs in two cases: when the sensor is untouched (pull up resistor value active) or when the end of the strip was touched. The second cases causes a small issue as the end of the sensor does not perform as expected and caused the pitch bend to go back to zero. This can be mitigated in future builds by performing a map on the values to use the small and large ends as constant values.
An observed side effect of polling the sensor every program loop was a program slowdown due to the slow speed of performing analog to digital conversions. In order to mitigate this issue a timer was installed. The code currently checks the sensor every thirty milliseconds.
Wave Visualization
When a note is played on the Rainboard a wave animation occurs. The wave is calculated in realtime and will actually interact with other existing waves. To find out more information please check out the Rainboard Wave page.
SysEx Speed
Information is sent to the Rainboard from the iPad using SysEx messages (for configuration). There is a somewhat large chunk of data that is sent across for these commands. The existing Arduino code was having issues after receiving about 114 bytes of information in a data stream. In order to make the transfer go very fast without artificial slowdowns in the code, heavy optimization was done. More information can be found on the Rainboard SysEx Page.
Future Plans
Being as the buttons do not have double press detection, the keys are not velocity sensitive. However, we added an accelerometer to the centre of the board in order to try and allow some velocity sensitivity.
We also added a touch strip to the side of the Rainboard to act as a pitch bend.
Issues / Limitations Encountered
Bliptronics lights / SPI / Serial breaking
The Arduino library [10] that comes with the bliptronics lights uses SPI [11] in order to send data to the lights quickly. It was found that once the blip library was included with the project and init was called, hardware serial data receive (rx pin 0) on the arduino would not work. The current explanation is that the blip library spends a large quantity of time inside an interrupt. This is causing the serial rx interrupt to not be fired and the receive data is lost. So cercumvent this issue, SoftwareSerial is used instead of hardware serial. For more details on the issue please visit Rainboard SPI LED Serial Conflict page.
SerialSoftware (NewSerialSoftware v11b)
In order to work around the broken hardware serial rx, a software serial solution called NewSoftSerial [12] was used. The version currently being used is version 11 beta [13]. This library will like replace the SoftwareSerial library included with the Arduino software. The serial connection is used to talk to the red park serial cable. It appears that connections from the Rainboard to the iPad worked fine, but data would get corrupted from the iPad to the Rainboard when sending more than a few bytes. This issue has been fixed by altering the timing of the serial receive delays. For more details on the issue please visit Rainboard NewSoftSerial.
External Links
- ↑ http://www.bliptronics.com/item.aspx?ItemID=114
- ↑ https://www.adafruit.com/products/471
- ↑ http://spikenzielabs.com/SpikenzieLabs/Button64Shield.html
- ↑ http://arduino.cc/en/Main/arduinoBoardUno
- ↑ https://www.sparkfun.com/products/10955
- ↑ https://www.adafruit.com/products/178
- ↑ http://www.sparkfun.com/products/10587
- ↑ http://redpark.com/c2db9.html
- ↑ J. Catsoulis. Designing Embedded Hardware. O’Reilly Media, Inc, May 2005.
- ↑ http://bliptronics.com/Arduinocode/BLIP_LEDS_SPI_LPD6803.zip
- ↑ http://www.arduino.cc/en/Reference/SPI
- ↑ http://arduiniana.org/libraries/newsoftserial/
- ↑ http://arduiniana.org/2011/01/newsoftserial-11-beta/
